Learn How to Start a Blog on WordPress Quickly
You’ve decided to start a blog! Awesome!
However, you may now be asking yourself, “How the heck do I start a blog on WordPress?” If you are looking for a quick and easy, step-by-step tutorial for getting started setting up a blog with Bluehost, you have come to the right place!
How to Start a Blog – Basics
- Pick a blog name that is descriptive or brandable.
- Register a domain name to claim your blog’s home on the internet.
- Purchasing hosting to get your blog online.
- Customize your blog by choosing a free template.
- Write & publish your first post…then keep creating quality content!
- Promote your blog to get people reading your blog.
How to Start a Blog on WordPress
Chances are you’ve put a little bit of thought into this whole blogging idea before you got to the point of looking for “how to get started setting up a blog” tutorials.
You may even have ideas about a blog name. Or what you want to write about. You might even have some ideas for a domain name, which is all great! That will make your process go a little bit smoother.
**This post may contain affiliate links for your convenience. This means if you purchase something through one of my links, I may receive a small commission with no extra cost to you. For more information, see my disclosures here.

Do you EVER want to make money from your blog?
The answer to this question is essential. It will impact things like your blog name, your niche, and even the tech you use. So if you think at some point you may want to make money – even if it’s a ‘well, maybe at some point, if things go OK,’ then start planning for that from the beginning. It is MUCH harder (not impossible, but much harder) to go back and change things later on.
So let’s get started!
Decide on a Domain Name
The domain name is the part of your URL that identifies your site. It is your site’s address on the World Wide Web. For example, my domain name is TechGirlHelpDesk.com.
Here are a few things to keep in mind when choosing a domain:
Do your research! Make sure the name you are thinking of is available and that it or some variation of it is also available in most of the top social media channels. A great FREE resource to use is Namechk. Just type in your domain name, and it shows you that particular domain’s availability. Just to cover all your bases, I would also recommend you do a manual search as well.
Find a balance. Giving your domain the name “A Blog” is way too broad and “A blog about a Mystical Purple Unicorn” is way too narrow. You don’t want to make your niche so narrow that you limit the content you can create, your reach and or the opportunities to monetize your site.
Things to avoid. Try not to include special characters, numbers, or hyphens in your domain name. They tend to be a bit confusing and hard to search. Try to choose a domain name with the .com ending. A .com is still the most common type of domain name extension and what most people expect.
Don’t overthink it! Just get started. You may start with one idea in mind and then plans change. That is OK! More of a reason to maybe go with a more neutral domain, unless you are positive about what you want to blog about. Worst-case scenario, you can always switch your domain name and create a new one down the line.
Now that you’ve chosen a domain name. Your domain needs a hosting provider.
Choosing a Host & Registering your Domain Name
The reason you need a hosting company is that you are opting for a “self-hosted” site (because self-hosted blogs can be monetized). A host is a service that allows you to have space on their servers to host your website. You can think of it like this; hosting is equivalent to renting an apartment in an apartment building as opposed to owning your own single-family home.
WordPress is the most powerful and reputable content management system (CMS) out there and why you are choosing it as your blog foundation. Although there are some fees involved in going with a self-hosted blog, you have more freedom and control over your blog in the long run which is the way to go if you are looking to monetize your blog.
Bluehost is a popular hosting company of choice for most people just starting out. It is affordable, has an excellent reputation, and is reliable. Coming in at just $3.95 per month (at the time of this writing) when you commit to 36 months of hosting. The 36-month plan is their best value and completely risk-free. If you decide to end services, they will reimburse the remaining account balance (within the first 30 days).
Also, with Bluehost, you can register your domain for FREE! However, if you use my affiliate link, you can get a special discount when you signup.
Alrighty, then, let’s get started with Bluehost …
1. Go to Bluehost
To get started, head over to Bluehost.com and click on the big, green “Get Started” button.

2. Choose a web hosting plan
Once you click “Get Started,” you are taken to a page where you can choose a hosting plan.
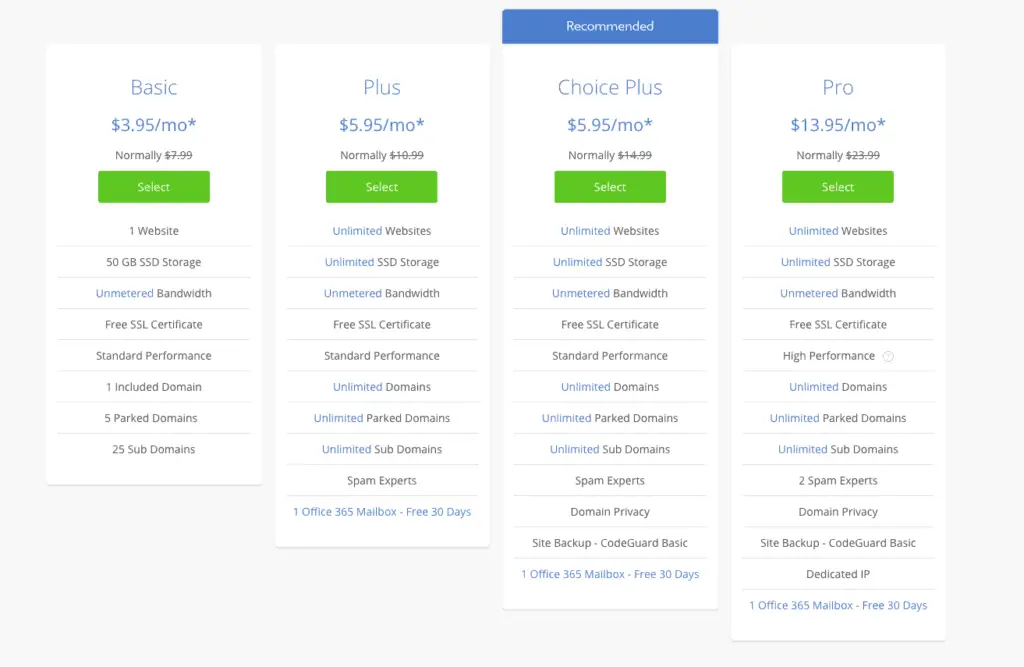
Select the account plan of your choice. If you are just getting started, a Basic plan is a perfect option. You can always upgrade later on if you decide you need to.
3. Select Your Domain Name
Next, you can select a domain name if you haven’t done so already. Bluehost offers a free domain name when you register for a hosting plan.
Hint: It is a good idea to have a list of about 5 or more choices for your domain name, just in case your first choice is not available.
Go ahead and enter your first choice for your domain name in the space provided in the ‘new domain’ box. (There is also a drop-down where you can also select a different ending (.net, .org, .biz, etc.) if you prefer.)
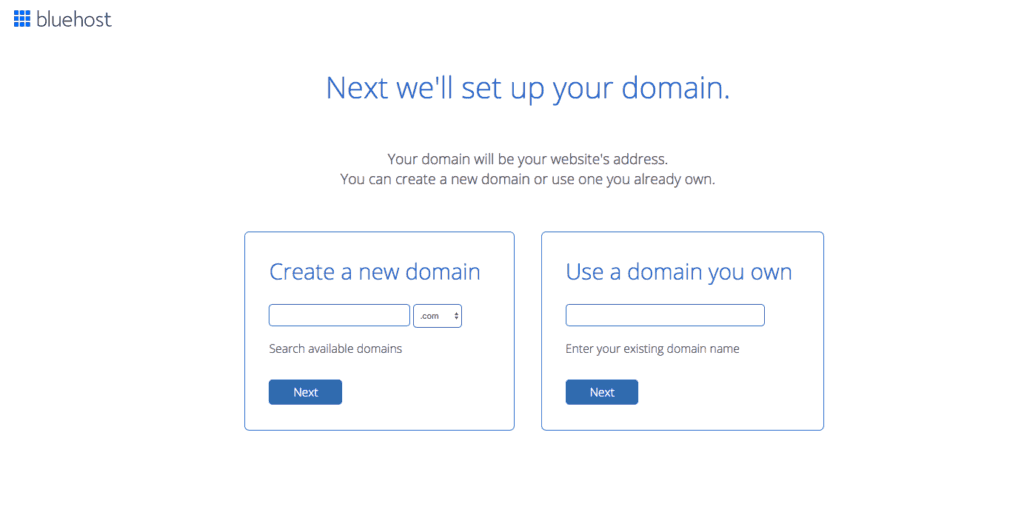
If your choice of the domain name is not available, Bluehost lets you know, and you will need to select your 2nd (or 3rd, or 4th, etc.) option until you get an available one. Then click the next button.
Suggestion: If your domain name is available with the .com ending, you should choose that one, as the .com is still the most common extension. Later on, you may consider purchasing your domain name with other endings (.net, .org, .biz, etc.) or similar, alternative or creative spellings of your domain name so that you won’t miss out on any future traffic if someone misspells your domain URL.
Already have a domain name? You can fill in your domain name in the ‘i have a domain name’ box on the right.
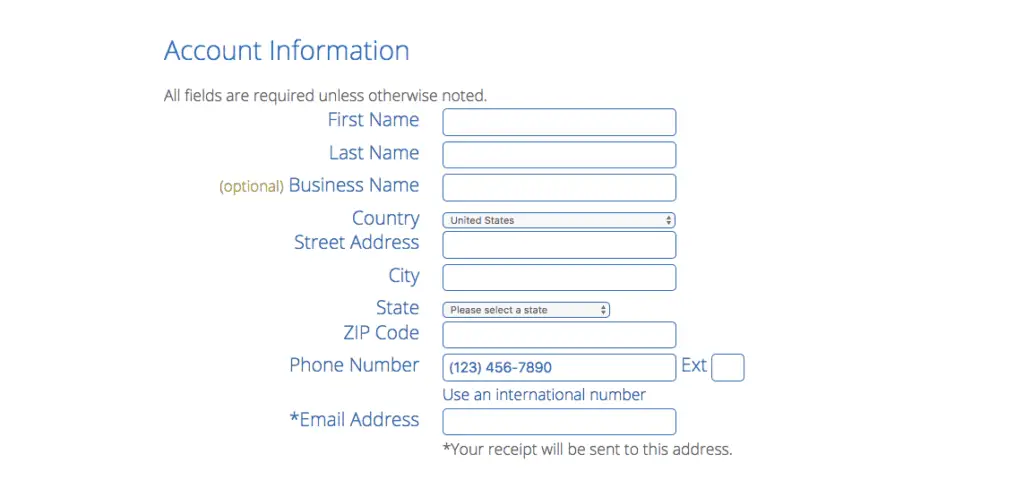
4. Fill out your information
This first section is pretty self-explanatory, enter your personal information (name, address, contact information, etc.) in the spaces provided on the “create your account” page.
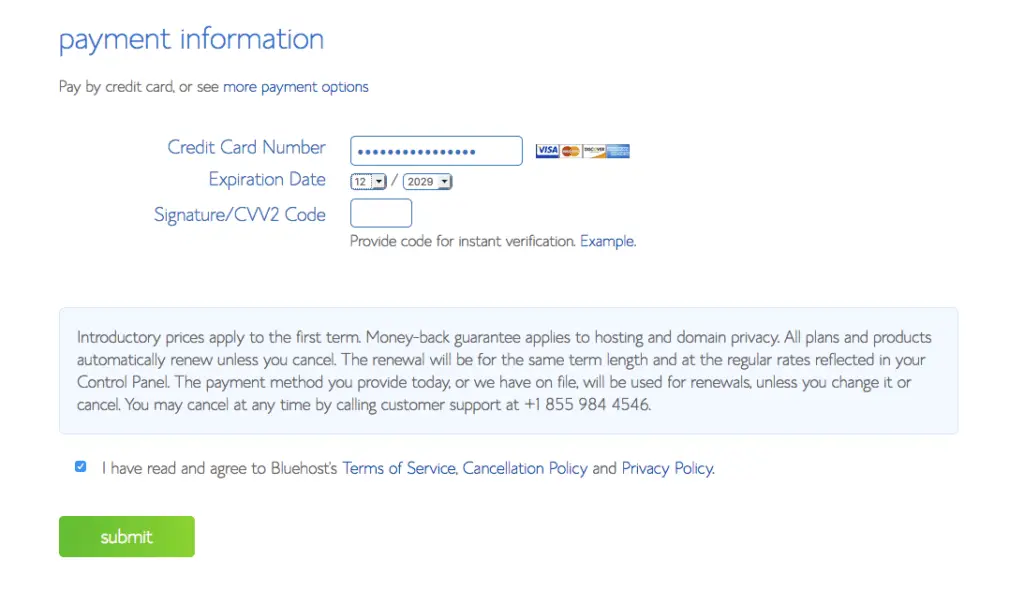
5. Enter payment information
Enter your payment information and then click the green “Submit” button.
6. Pick Package and Options
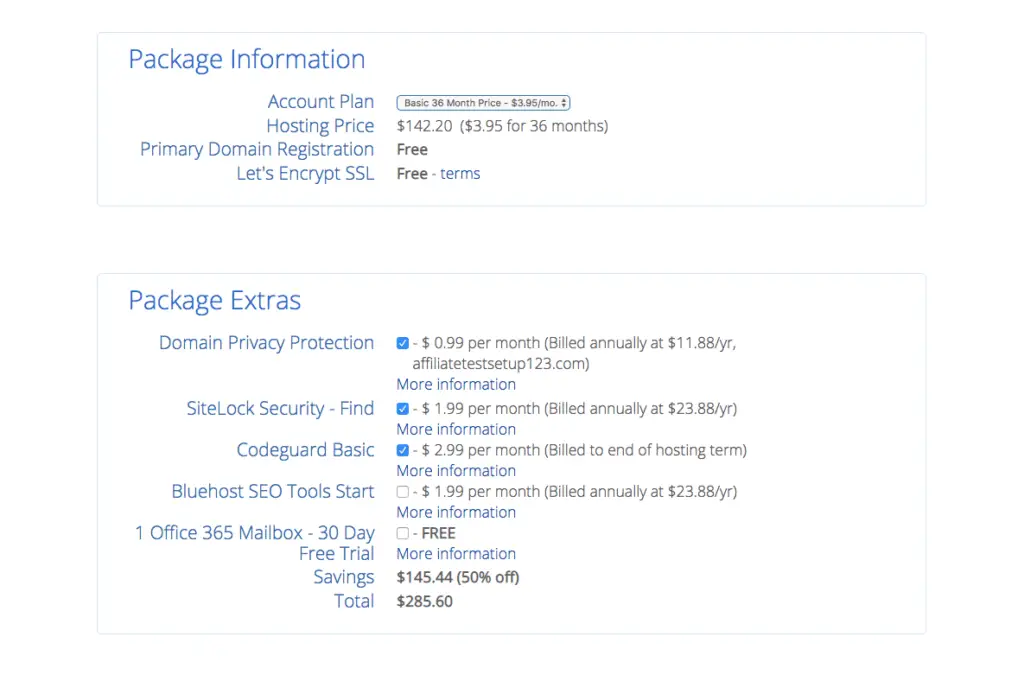
Bluehost offers a bunch of great add-ons. Most of them are not necessary, but you may want to consider them.
- Domain Privacy Protection is only $0.99 cents more per month and will provide your personal information some privacy (see, what I did there?), such as your name and address. If privacy is important to and you want to keep your website and domain information anonymous, go ahead and spend the extra $0.99 per month. If that doesn’t matter to you, be sure to uncheck this box.
- SiteLock Security is an add-on service that verifies your personal information, like your e-mail address, your physical address, and your phone number. If you plan on selling a product or services on your site, this feature can help prove your site’s credibility to your potential customers. This service option is a good value at $1.99 per month and billed yearly at $23.88 per year.
- CodeGuard Basic is a service that provides extra security for your website. WordPress is a very secure platform, but this extra feature works behind the scenes, taking daily backups and saving each as a separate version – making it easy to turn back the clock should disaster strike. If you think you might use this feature, it’s definitely worth the extra $2.99 per month, but know that there are also other plugin options available for backups as well.
- Bluehost SEO Tools Start is a service that Bluehost is a tool that will allow you to develop a plan in order to accomplish best search engine optimization (SEO) practices to drive traffic to your site. This feature is also $1.99 per month, billed yearly at $23.88 per year. But again, know that there are also other free plugin options available to help you with SEO as well.
Once you’ve selected any add-ons and signed up for a Bluehost account, now you can build websites using your chosen domain name or an existing domain name.
7. Choose a Password for Your Account
Next, choose a password for your account. Click on the button that says, “Create Account.”
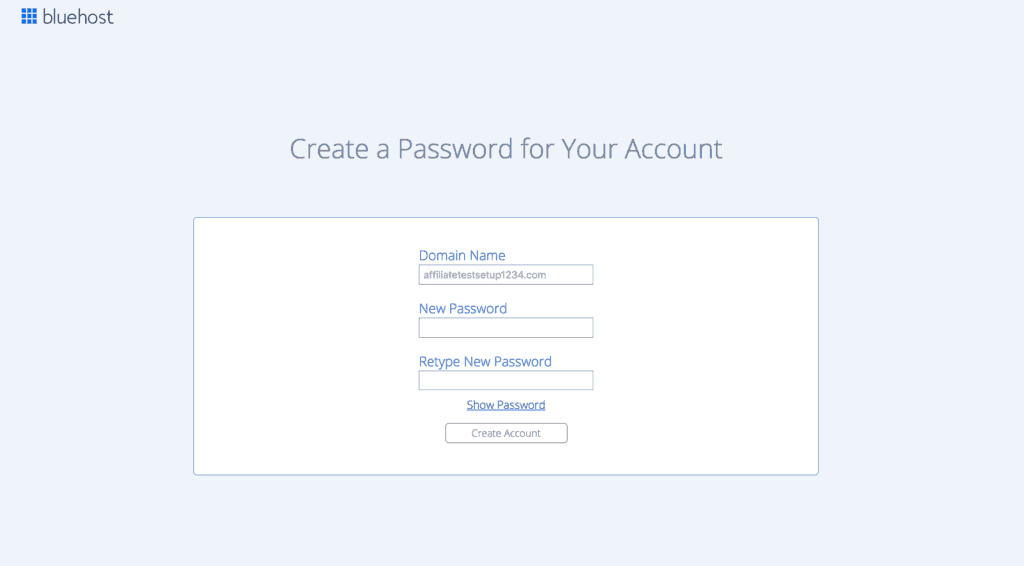
Choose a secure password that you can remember. Be sure to take note of it somewhere for future reference. Check the box once you have read and agreed to Bluehost’s Privacy Policy and Terms of Service. And then click the blue “Next” button.
8. Congratulations! Nice Work!
Woohoo! You’ve successfully created your account and now you can log in!

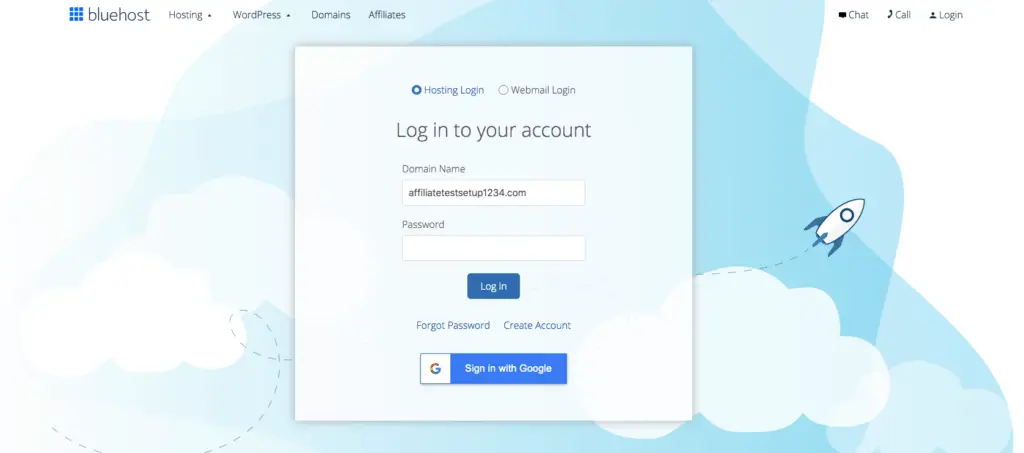
9. Log In to Your Account
Use your newly created password and log in to your Bluehost account.
10. Let’s Create a Website
Here you can decide on the human-friendly name of your site and a tagline for your site.
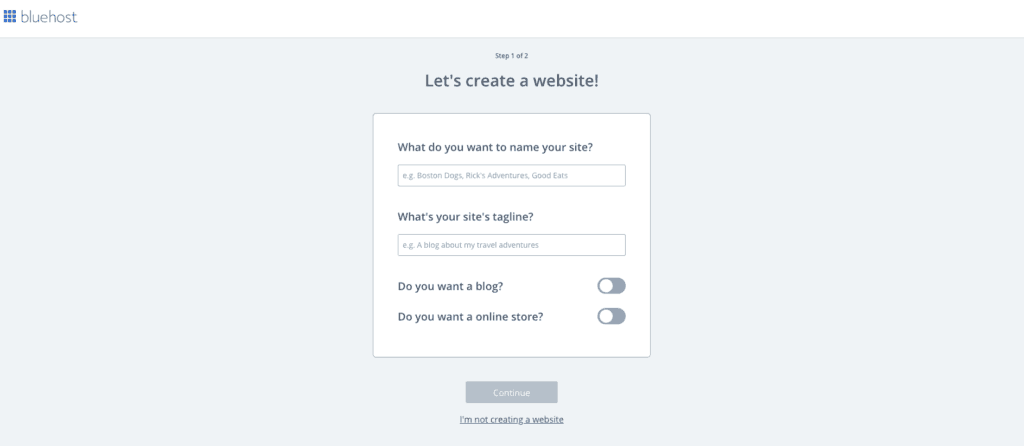
Often new bloggers think that the name or title of their blog has to written the same ways as the URL of their site, with no spaces. However, that is not the case. You want your blog title to be written as a proper title. Plus, some people choose their own name for their domain name but want their blog to have a more creative name.
Here is also where you can add a tagline for your site. For example, the tagline to my site is “Tips & Tricks for the technically challenged.”
And don’t stress over these things too much! You can always easily edit these things later on.
11. Additional Information
Bluehost now asks you for a little more information in order for them to be able to make better recommendations for plugins and extensions that you may find useful.
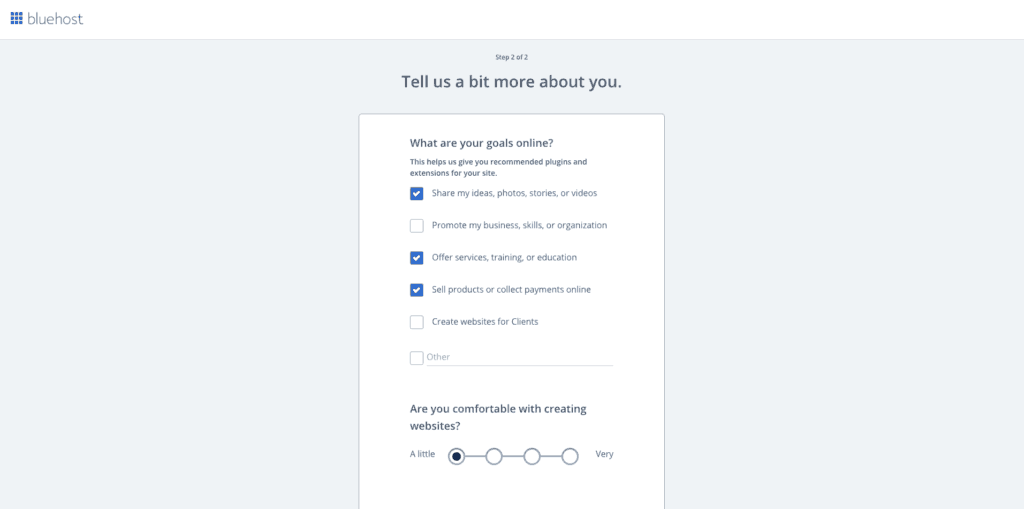
Again, don’t stress about these questions. They are only so that Bluehost can better serve you.
12. Pick a Theme for Your Blog Site
Pick a theme that inspires you. Don’t stress (I know, I’m starting to sound like a broken record…) about this too much! Pick one to get started, and you can always switch it later.
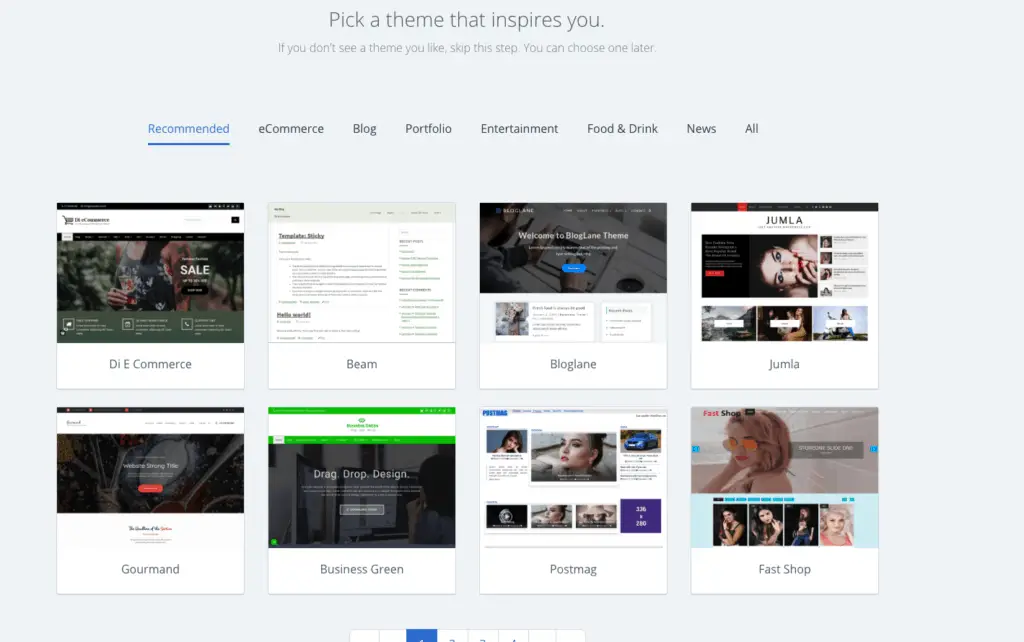
Word to the Wise: So often I see bloggers stopped dead in their tracks because they believe they need to have “just the right” theme and everything needs to look perfect before they can start blogging. Don’t be that person! Pick a good quality, free, responsive theme to start. Get started writing content while you are still inspired and excited about starting a blog. Blogging is a journey. Don’t let your journey get stopped before it ever begins.
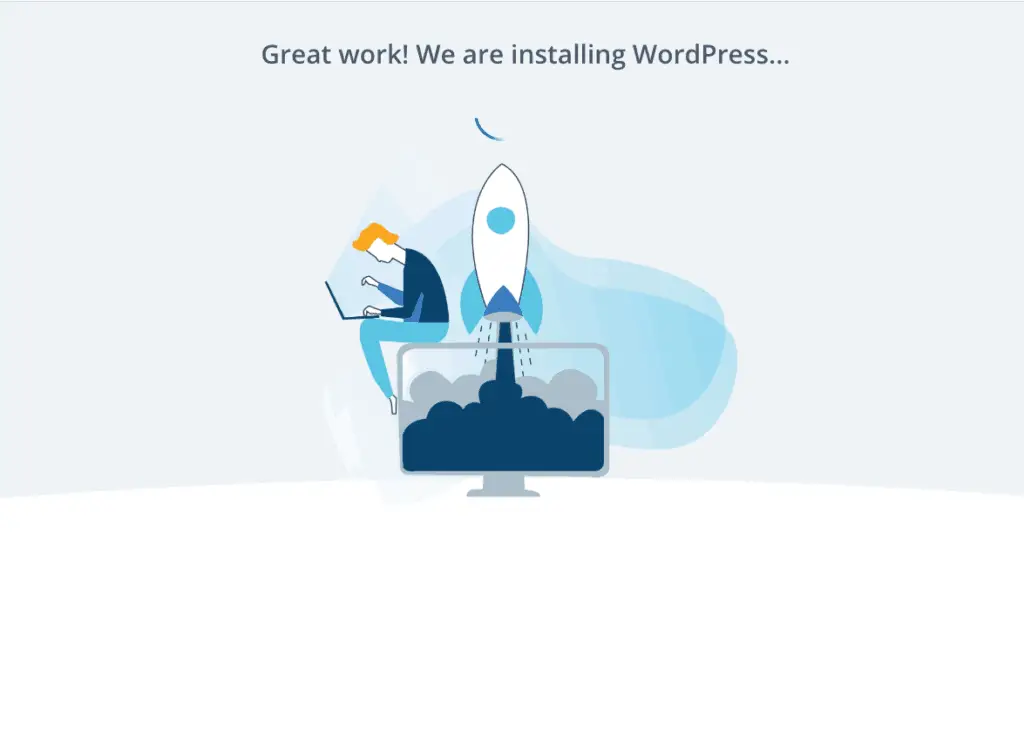
13. Installing WordPress
Bluehost makes things easy on us bloggers and website owners by automatically installing WordPress for you.
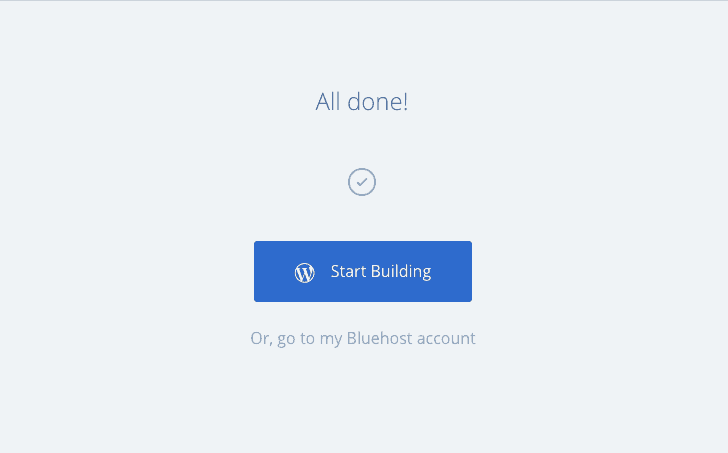
14. Start Building Your Blog
Hooray, you can start building your blog! Click on the “Start Building” button.
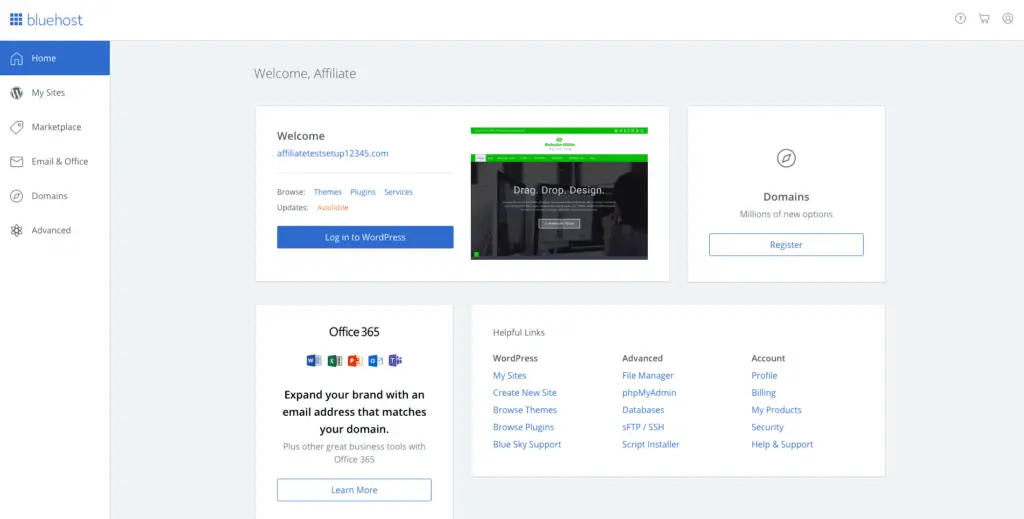
15. Your Bluehost Dashboard
When you got to your Bluehost account you will find your Bluehost Dashboard, where you can access your account profile, billing information, cPanel and much, much more.
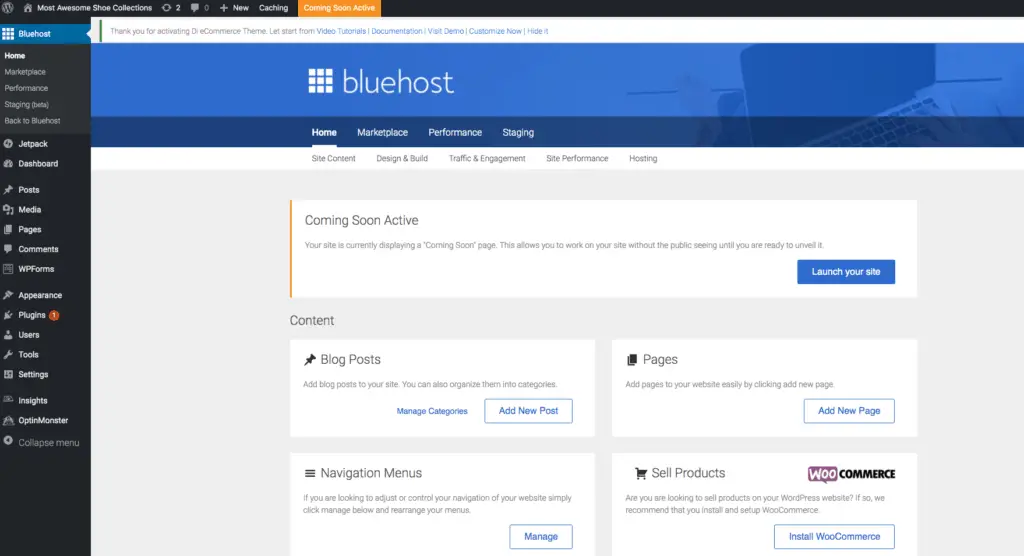
You Did It!
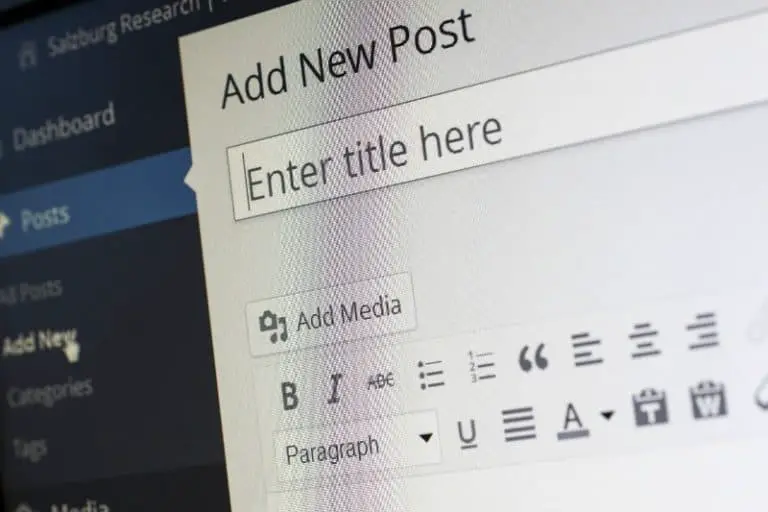
From your WordPress dashboard, you can start writing content for your pages and posts, adding media, customize your theme settings, add plugins and much more. It’s time to finally start bringing your blog to life.
Encouragement & More Words of Wisdom: CLICK THAT LAUNCH BUTTON NOW! Don’t wait for everything to be perfect. Write your first post. (Download this list of 120 blog post ideas if you aren’t sure where to start). Let it be less than perfect. Nothing you write is set in stone. You can always go back and edit and improve and change your content. Let each post you write and every time you hit that publish button be the motivation that keeps driving you forward to keep creating. DON’T GIVE UP! BABY STEPS! YOU’VE GOT THIS!
That’s it! You did it! You created your very own blog using this simple how to start a blog on WordPress with Bluehost guide! I’m so proud of you!
Just in case you need a little more help getting up and running. This video from WPBeginner is a great resource to walk you through the entire process. Plus walks you through some extra things like setting up your permalink structure, creating pages, menus, and even writing your first post.
How to Start a Blog

Getting a blog up and ready for you to start writing doesn't have to be difficult. Use this handy list to walk you through the process of signing up for hosting through Bluehost in under an hour.
It should take WAY less than an hour's time to do this. But just in case your life looks a little bit like mine--the phone rings, you can't find your credit card, or the cat spills your coffee--even with life's distractions, you can be up and ready to write in WAY less than an hour!
Instructions
Part 1 - Registering a Domain Name & Signing Up for Hosting
1. Choose a domain
2. Sign up for hosting (I recommend Bluehost)
3. Go to Bluehost and click on the big, green “Get Started” button
4. Choose a web hosting plan
5. Select a domain name (if you haven't done so already) or enter a domain name that you already own
6. Fill out your personal information.
7. Enter payment information
8. Select package plan and options
9. Choose a password for your account
10. CELEBRATE!! You now have a domain name and hosting! Nice job!
Part 2 - Create Your Blog Site
1. Log in to your account
2. Create a website by choosing a human-friendly name of your site and a tagline for your site. You can also select what type of site you want
3. Additional Information - Bluehost now asks you for a little more information to further customize your experience
4. Pick a theme
5. Install WordPress
6. CELEBRATE SOME MORE!! You did it! Your blog is ready for you to start writing!
Notes
For more in depth instructions you can find my step-by-step tutorial here.