
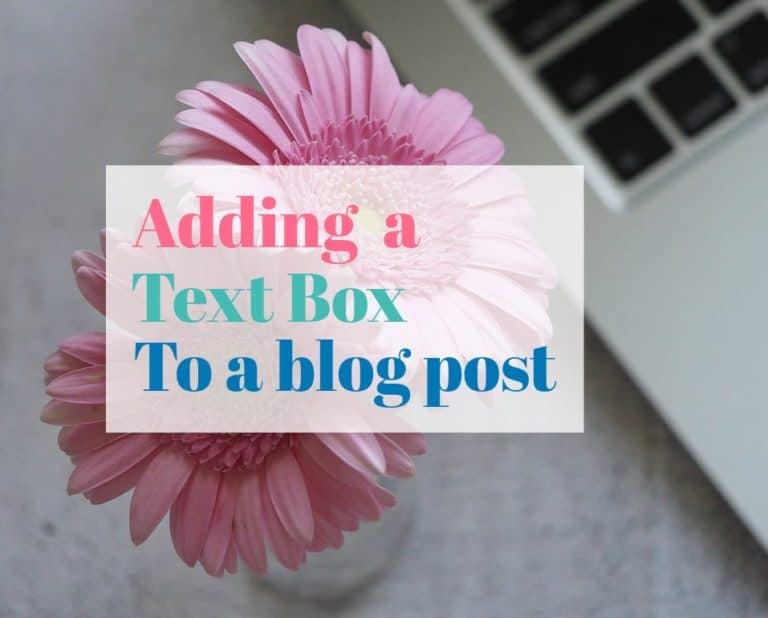
Resizing Images Using PicMonkey
Resizing Images Using PicMonkey
Image size matters!
A key component of any successful blog is its images. No matter, what you are blogging about, adding images to your blog post engages your readers and creates interest. Regardless of the blogging platform you use, resizing and editing images is a critical step in creating great content for your blog. Resizing images using PicMonkey is quick and easy and has been my go-to for all kinds of photo editing needs for years.
What is the big deal with images?
Website hosting packages have a limited amount of storage space allotted for each site. Your image files take up a lot of that space, so getting your images to the best size for your blog is essential.
The more content you create, the more important image size becomes. A huge unedited image takes up an enormous amount of space compared to an image that is optimized for your blog.
**This post may contain affiliate links. Which means if you purchase something through one of my links, I may receive a small commission with no extra cost to you. For more information, see my disclosures here.
Find out the ideal photo size for your theme
One of the most important things to consider when working with images for your blog, is what is the ideal size image for your theme?
There are so many things to take into consideration when figuring out what size images should be, but a good place to start is to find out what size is for the main content area of your blog.
For example, the documentation for my theme tells me what the optimum image sizes are for my theme. The main content area of my blog is 800 px wide – which means I wouldn’t want an image to be bigger in width than that.
However, photos straight from our smartphones and cameras generally produce images that are considerably larger, which take up quite a bit of memory. These would not be good to upload directly to your blog until they have been resized.
Cropping to specific image sizes
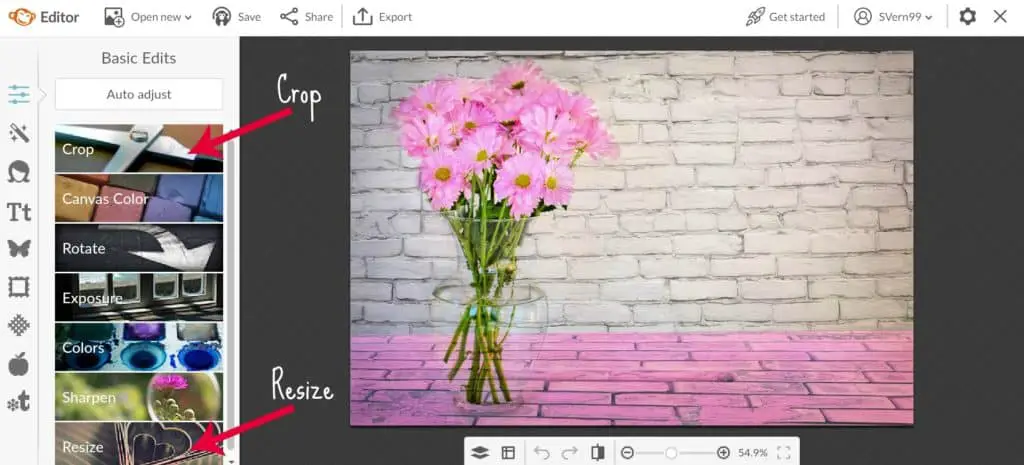
One option for resizing images using PicMonkey is to crop them to the ‘just right dimensions’.
Open your image in the PicMonkey Editor and find Crop in the Basic Edits tab:
- Use the preset crop proportions in the drop-down menu to accurately crop your image. (There are standard printing sizes, screen sizes, and some standard social media sizes as well.)
- Get specific with pixels in the Actual size fields.
- Use the Rotate crop button to the right of the Actual size fields to go from a horizontal to vertical (or vice versa) cropping area.


- When you are happy with your newly cropped and or rotated image, click ‘APPLY’.
Cropping is a good option when there is some extra space around your photo that could be cut out without affecting the image’s composition.
Resize images in PicMonkey without cropping
Another option for resizing images using PicMonkey if you would rather not take anything away from your beautiful photo is to simply adjust the size of your photo.
PicMonkey has a Resize tool in the Basic Edits tab:
- Here you can select and enter the exact dimensions (ex. 800 px in the first field–which is the width) you need.
- Or you can play around with resizing the image by percentages, by checking the ‘Use Percentages’ box. This will change the numbers in the fields above to 100%, so you might change the size to 80%, for example.
- Make sure that ‘KEEP PROPORTIONS’ is checked, otherwise you could end up with some very odd and distorted looking images.
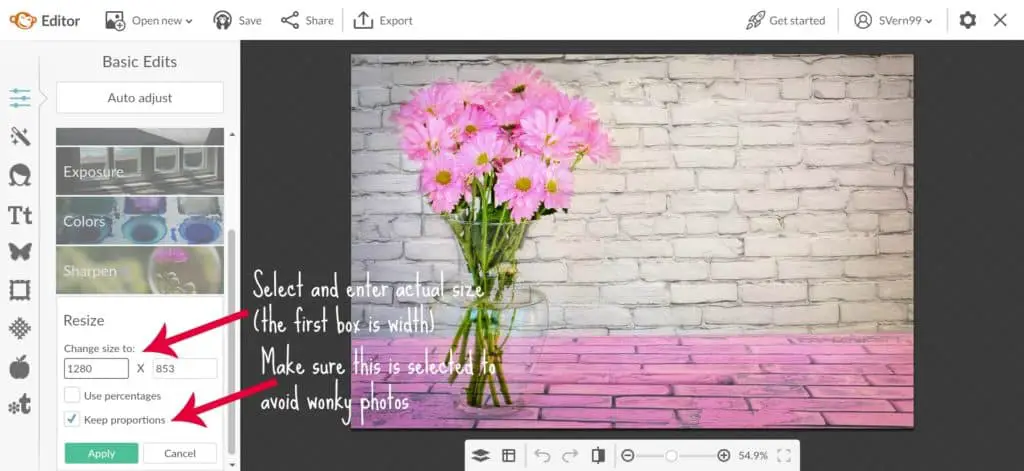

- When you are happy with your newly sized image, click ‘APPLY’.
Social Media Images with PicMonkey Presets
Maybe you need an image for Facebook or Pinterest and don’t feel like thinking about what the optimal image sizes are?
Use the Crop function in the Basic Edits tab and select Facebook Cover Photo or Pinterest Pin from the drop-down menu of preset crop proportions.
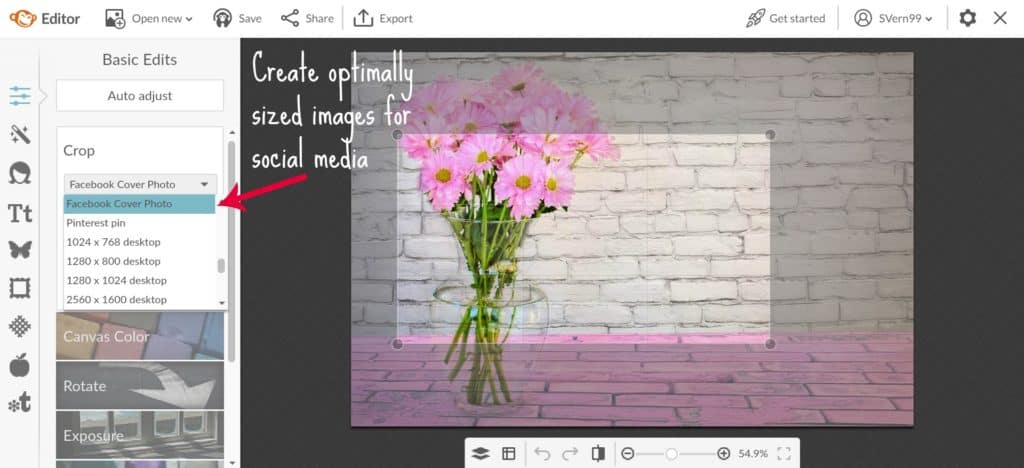
These presets will give you the best-sized photos that look gorgeous on all of your social media channels while avoiding annoying error messages like “file too large” or “file too small.”
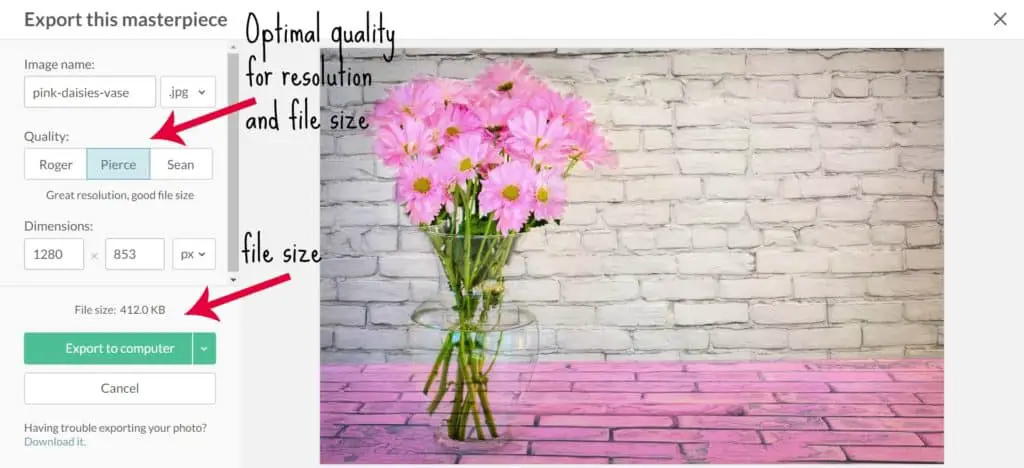
Save images to the right file size
When you have finished cropping or resizing your images, it is time to save and download your optimally sized images. Finding the right balance between file sizes and image quality is always a tough decision.
With PicMonkey, when you click Export on the top toolbar in the Editor, you’ll notice three interestingly named quality levels:
- Roger: Not great quality, tiny file size
- Pierce: Great quality, good file size
- Sean: Gorgeous, but large file size
You’ll notice that the file size is displayed right above the green, Export to computer button. Select the option that offers the ideal balance between image quality and image size for your purpose.
(I always go with option #2 Pierce…as I have come to trust PicMonkey to know what they are talking about!)
Having optimally sized photos is easy when you have the right tools.
Remember, “a picture is worth a thousand words.” Resizing images using PicMonkey is such a simple way to create perfectly sized images for your blog.
Make sure the photos you use on your blog enhance what you are trying to say to your readers and that they don’t slow down your site’s speed.
Join the newsletter
Subscribe Now!
Get our latest tech tips, tricks and tutorials delivered straight to your inbox.


Thanks , this will help me a lot. I have bookmark this page right away!
Thanks so much for sharing! I have been looking for an easy way to resize my images and make them look proportional to my blog theme!